My 1970 VW
Camper
�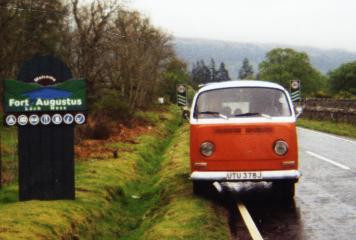
Here it is, UTU 378J photographed
at Fort Augustus in Scotland by its previous owner, a guy from Macclesfield in Cheshire. I
acquired the van from him in October 1997 after he decided that it he could no longer
afford the fuel costs. He said that the MOT had lapsed and, due to a number of electrical
faults (lights, horn, etc) that he - not being electrically minded - would be unable to
fix, he was willing to cut his losses and let it go for a sensible price. Since I was
looking for a fairly solid van just in need of tidying here and there, and since I'm
reasonably competent when it comes to electrics, I decided to offer him �450, which he
accepted. The bodywork looked generally good, with only a small amount of welding (a
couple of plates) required to sort out the MOT. The paintwork was pretty terrible, since a
previous owner had painted over the original white below the window line with a thin coat
of orange, which was peeling off in chunks. The interior was excellent, with a gas cooker,
sink, table, bench seats and a fold-away double bed.
The journey home from Macclesfield to Ellesmere Port
(about 35 miles) went smoothly in spite of the fact that the engine kept cutting out at
every junction, the indicators and horn were not working, and the handbrake was
non-existent. Having booked the van in for an MOT at a nearby garage (mainly to make the
journey home legal) it was my intention to spend a few days sorting out the necessary work
so that I could at least drive around for a few weeks before taking the van off the road
for the winter. When I returned to the garage the tester handed me the failure list and
said "to be honest with you, mate, it's not worth it". If I knew then what I now
know eight months later I'd have probably agreed with him!
Near Side Floor
Replacement
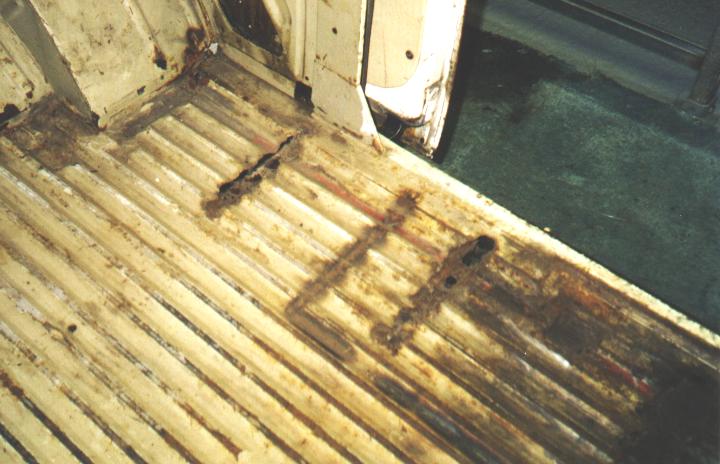
The floor on the near side had rusted through around each of the supporting members (top
hats and 'c' sections) roughly level with the width of the sliding door opening. It is my
opinion that this is probably due to dirt and moisture getting trapped between the
corrugated floor and the supports. A previous owner had repaired this by cutting through
the rusted supports, thus removing them between the inner sill and the chassis beam, and
welding a flat sheet with home-made supports under the original floor panel. The repair
looked excellent from underneath but terrible from above!
��
Without fully understanding the magnitude of the task that lay ahead of me, I decided to
replace the entire floor section between the rear wheelarch and the back of the front
passenger seat, and between the sill and about 6 inches short of the centre of the van. I
would use this opportunity to replace the floor supporting members and the front
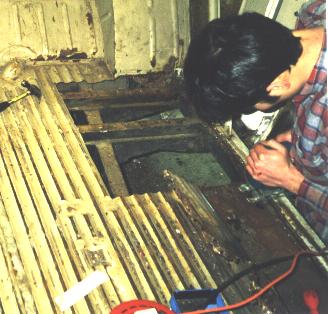
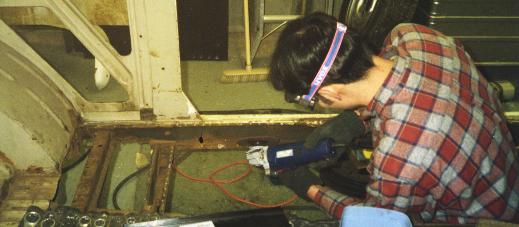
outrigger. I started by removing the old panel with a jigsaw, using a hacksaw and a drill
to cut through the supports. I drilled out the spot welds along the top of the sill and
across the base of the rear wheelarch and the front seat back.
Once the bulk of the old metal had been
removed I discovered that the combination of rust and my chiselling at the spot welds had
more or less destroyed the inner sill, so I decided to remove it from the thick central
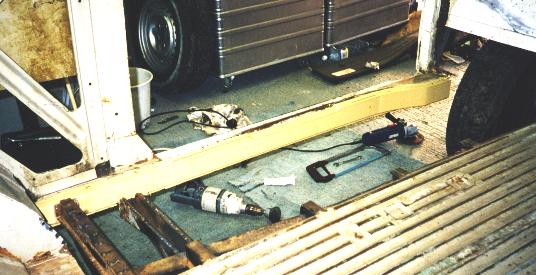
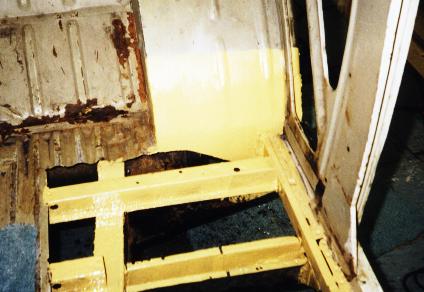
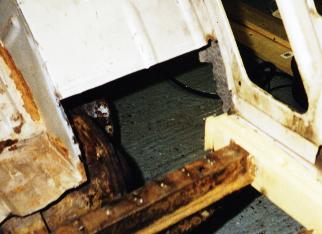
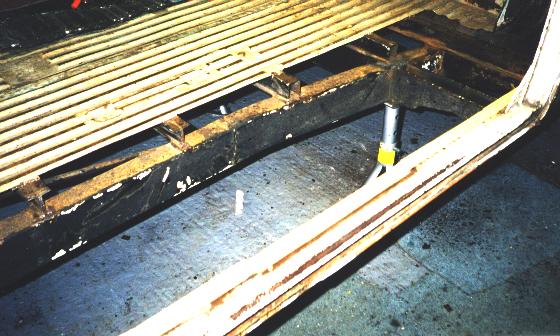
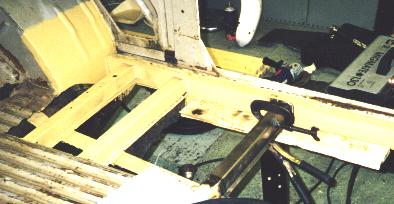
plate (whatever you call it). The first two pictures above show the floor/sill removal
process, and the third picture shows the newly fitted inner sill.
At this stage I turned my attention to the front closing panel on the rear wheelarch,
since this was rotten and it would be a good opportunity to access it. I jigsawed the old
section out and welded the repair section in without any problems.
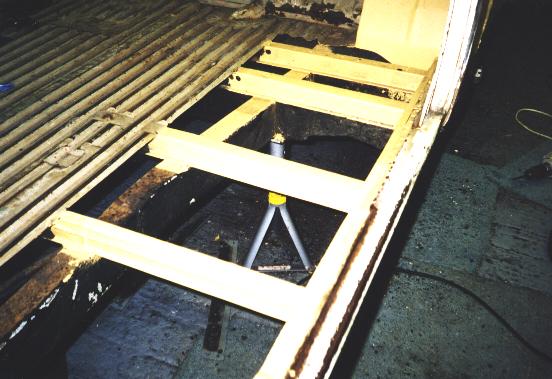
Having replaced the inner sill, I squared off the edges of the existing floor support
members and started to fit the replacement sections. These were held in position as shown
with clamps, etc. I aligned each one against the position of the lip on the inner sill.
Since one thing has a habit of leading to another, I decided to butcher the lower portion
of the passenger seat back whilst the top hat, outrigger and jacking point were absent.
Excepting my decision to remove the entire floor in the first place, this led to my first
mistake. I assumed that the repair panel for the seat back, which is actually the rear
portion of the front wheelarch, would be considerably bigger than it turned out to be, so
I removed too much metal. This taught me an important lesson - don't cut away anything
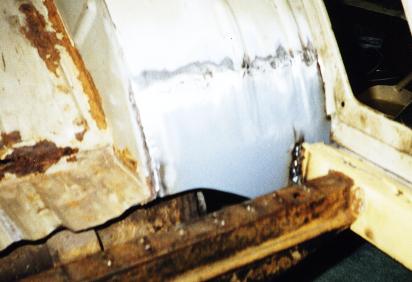
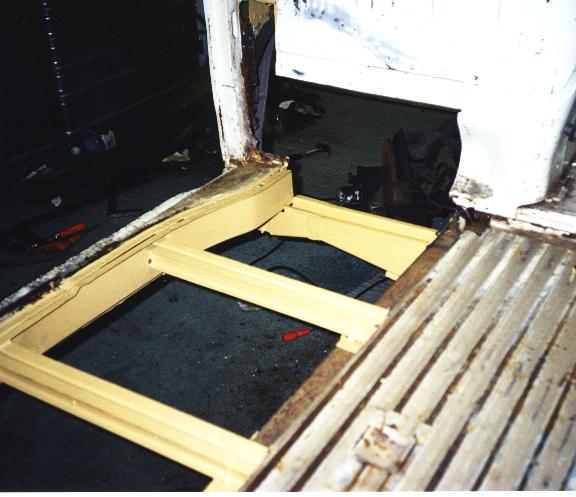
before you have the panel to replace it! The picture below shows what was left just after
I had fitted the outrigger/jacking point.
That's all for now
Coming up in the next few
weeks you can read about these jobs:
Completion of the
floor (the worst is still to come)
Seat back (front
wheelarch) repair
Outer sill
replacement
Battery tray
replacement
Rear wheelarch
side panel and rear quarter replacement in one go!
Rear closing panel
replacement
Seatbelt mount
replacement
E-mail me with your questions, comments and suggestions at
[email protected]


